
Images and documents
When uploading images and documents to the Media library, the Eplica System recognizes which type is being uploaded and categorizes it accordingly.
Insert images
- Position the cursor at the beginning of a paragraph.
- Click
 to access the media library.
- In the Media Library popup window, choose a media category by clicking the respective folder on the left side of the window (click the arrow to expand the subcategories).
- The Media Library categorizes media by types. images (jpg, gif, png), documents (word, excel ofl.), flash and mov (quicktime movies). Choose type from the Type menu.
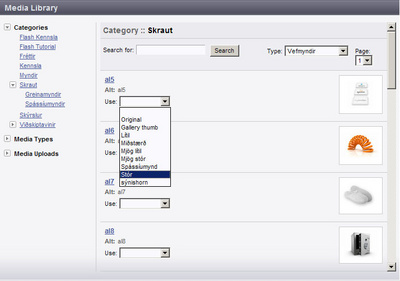
- If you choose an image, pick the appropriate size from the menu below the respective image (the Eplica System creates different image size copies when images are uploaded into the system)
- Choose Ok if you want to position the image manually (images can be moved by dragging them with the mouse cursor and aligned left, right or center). Choose Cancel if you want the system to position the image automatically (automatically linked images will not appear until the article is saved).
Align an image
- Select the image
- Click the align button from the Inline Editor


Insert documents
- Highlight a text by dragging over it with the mouse cursor.
- Click
 to access the media library.
- In the Media Library popup window, choose a media category by clicking the respective folder on the left side of the window (click the arrow to expand the subcategories).
- Choose Documents from the Type menu.
- Select Original from the menu below the respective document
- Choose Ok if you want to link to the document manually. Choose Cancel if you want the system to link to the document automatically (automatically linked documents will not appear until the article is saved).
Send images and documents to the Media Library:
- Click
 to send images or documents to the Media Library.
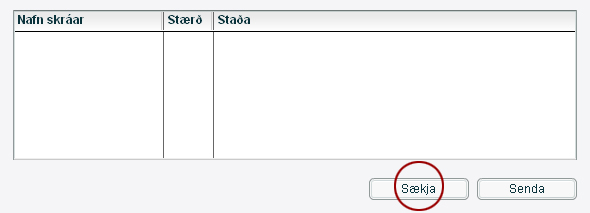
- Click Sækja (select) to browse.
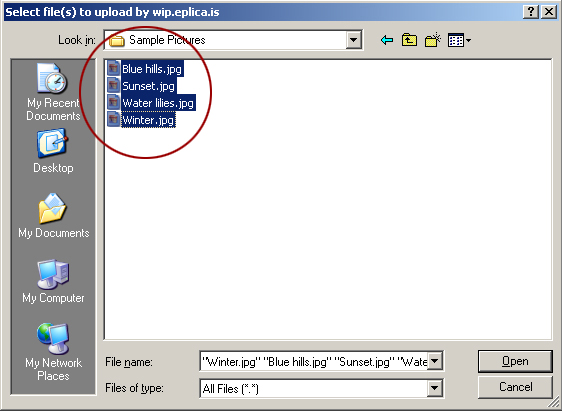
- More that one media documents can be selected at a time by pressing Shift on your keyboard and clicking other media documents. Ctrl can also be pressed on your keyboard to "pick" select multiple media documents.
- Click OK
The uploaded media documents will appear in the Media registration cue. The media documents will remain in the cue until they are either registered or deleted
- Insert a name for the document
- Insert an Alt Tag (Alt Tag is useful for screen readers but not required)
- Choose a Media Category
- Insert a Description (not required)
- Choose register to register the document (click delete to remove the document from the cue)
 Documents within the same media category cannot contain the same filename. If the filename exists you can overwrite the old document or rename the new document.